Tuesday, November 30, 2010

What to use instead of a tripod.

A few years ago I was listening to a German blogger and he suggested using a bean bag as an alternative to a tripod. It's been so many years since I heard that blog I can't recall the photographer who made the suggestion to give him credit. Anyway, it sounded good, so I made one and tried it.

Tripods can be bulky and awkward many times and time consuming to set up. They can also malfunction or break at awkward times.

DSC_0903

A bean bag can be a useful alternative in many situations when you need a long shutter speed, want bracketing shots or even a self portrait. They can be set up in a lot of places very quickly and taken down just as quickly.

You can set it on a block wall;

DSC_0899

The roof of your car;

DSC_0900

The dashboard of your car (remember if you do this you will have to adjust the white balance to account for the tint of your windshield. You should also ensure the windshield is clean.)

DSC_0901

Or the seat of your motorcycle.

DSC_0902

It even works with Super Zoom point and shoots;

DSC_0905

and pocket size point and shoots.

DSC_0904

Of course a bean bag can't replace a tripod in all situations such as standing in an open parking lot or field, but it's small, light and easy to carry and can come in handy in many situations. I made my bean bag with my sewing machine, some fabric and small plastic beads. I imagine filling a sock or ziplock bag with dried beans or rice would work just as well.

If you decide to give this a try let me know how it went for you and what you might have learned doing it.

Using focal length in outdoor portraits

I read in the Digital Photography School blog a post about taking portraits out of doors and what to do about the back ground. A question the photographer might ask him/herself is, "how much background do I want in my frame? Do I want to concentrate on my model alone or do I want to show my model in an interesting setting somewhere?" (I'm using 'model' as a generic identification of the subject in your photo like a spouse, friend or relative.)

I took my oldest daughter, Lauren, to a lot with iron sculptures to demonstrate how the background disappears from the frame as I backed farther away from her and used my zoom to keep her the same size in the frame.

Here's a photo of Lauren I took from a few feet away and my lens set back to 18mm

18mm

As you can plainly see she is framed close and there is a lot of her and a lot of background in the photo. A close zoom like this might be used to show your model and where you are in the same frame without having your model appear too small and almost unrecognizable (something I see in so many tourist photos.)

In the next photo I've backed away from Lauren several feet and zoomed my lens to 95mm. Here you can see the background starting to disappear and she is the same size in the frame.

95mm

Last shot from several feet away and zoomed out to 200mm.

200mm

Here you can see the background has almost disappeared and the model still fills the frame. You can do this with almost any lens/camera that can zoom. If you're using a simple point and shoot you will want use the Landscape setting so the camera will use a small aperture and get the back ground in focus.


Saturday, November 27, 2010

Another note on using flash outdoors.

So many people don't use the flash on their cameras when shooting out doors during the day. Here's an excellent example of why you should.

This is my buddy Dawn modeling for me.

Dawn in the shadow

In this first example I don't use the flash and you can see the shadow on Dawn's face. I suppose I could make it lighter by post processing it, but why bother. Just pop up the little flash on top of the camera and take the photo the right way.

Dawn in the shadow using fill flash

As you can see the flash filled in the shadow and Dawn's face is well exposed and you don't have to post process anything. So, to all you snapshooters out there, use your flash.

I had my cameras sensor cleaned right after I saw these photo's. Dawn does not have a spot on her face.

Thursday, November 25, 2010

Four months since my last update... so much for the resolution to make a post a week.

I like High Dynamic Range images (HDRi.) I've read many pro's and con's about it and really don't care about them. I like it so I'm going to play with it.

HDR is taking multiple images (three to seven) at different exposer settings to get a wide range of light then layering them on top of each other and tone mapping the image. There is a way to do it in PhotoShop and Stuck in Customs has a good tutorial on how to do it. There are several other programs that do most of the work for you, all you have to do is some tone mapping. I use Dynamic Photo HDR. It's an inexpensive HDR program and is very easy to use.

I am told the concept came from photographing the inside of cathedrals and was used to capture the entire range of light. If a photographer set the exposure to get the light from the stained glass windows the rest of the room would be too dark in the shadows. If the exposure were set to light the entire room, the light from the windows would be blown out. So the concept is getting multiple exposures then layering them to get the entire range of light in one image. I'm sure that's an oversimplification of the concept, but it should be easy enough to understand.

Here is an example of using three frames at 0 ev, +1 ev and -1 ev.
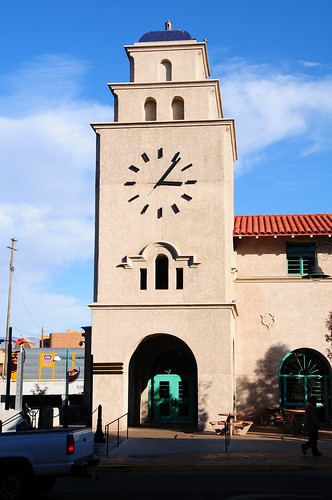
This is the Albuquerque train station at Central and 1st ST, downtown.

0 EV Here you can see the front of the building is properly exposed, but the door and windows are dark.
0 EV

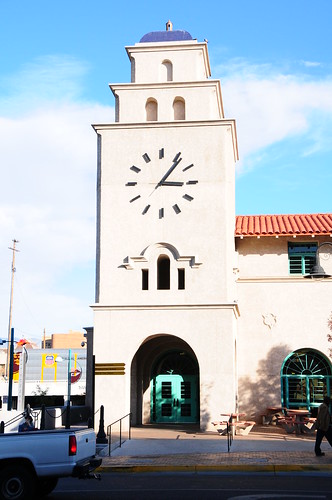
+1 EV Over exposed by one step you can see the building is washed out, but the inside of the door and around the windows is properly exposed.
+1 EV

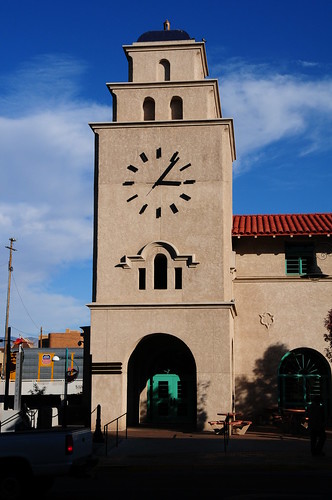
-1 EV Underexposed by one step you can see everything is dark. This layer will be to bring the highlights back to normal.
-1 EV

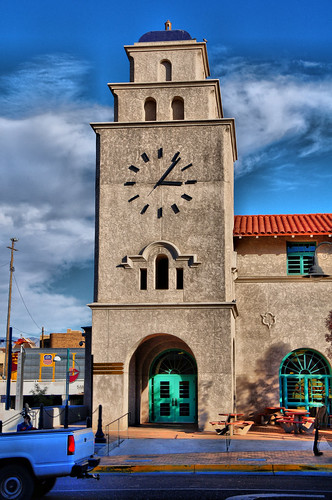
In each frame you can see the shadows and highlights look different. Now let's see what happens when they are layered onto each other.

ABQ Train Station HDR

You can see in this photo how the shadows in the door are now lit and the face of the building isn't blown out.

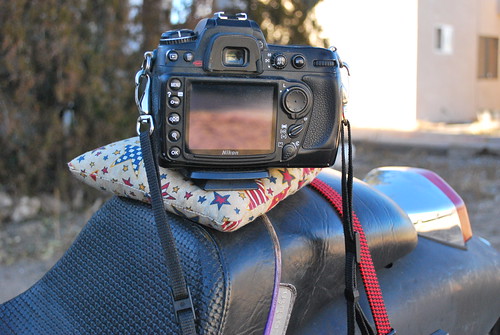
The easiest way to get the photo's is to use a camera that has an exposure bracketing mode. I've tried to do it with a camera that doesn't have bracketing and a tripod, but the results were three photo's that didn't quite match because the camera moved too much when I manually changed the EV for the three shots. Something I have found is if the shutter speed is fast enough I can take the photo's by hand holding my camera and setting the release mode to continuous advance.

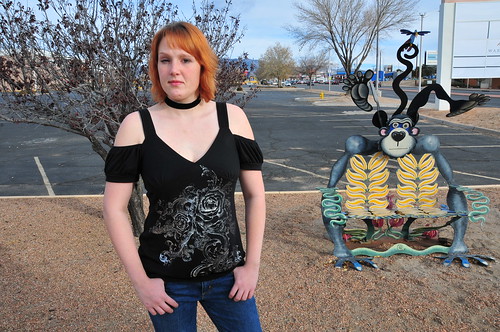
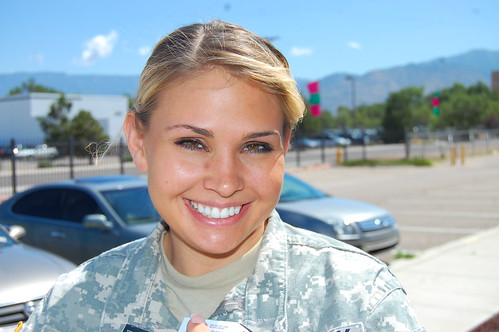
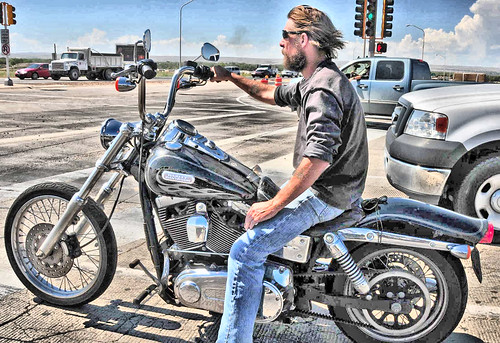
Here's another interesting facet of HDR; you don't always need more than one frame. Here's a faux HDR photo of my brother using one frame and tone mapping (I get heavy handed with the tone mapping.)

Puerco-Tom_fhdr


HDRi has it's critics and isn't for everyone, but for those who do like it I hope this little post helps.